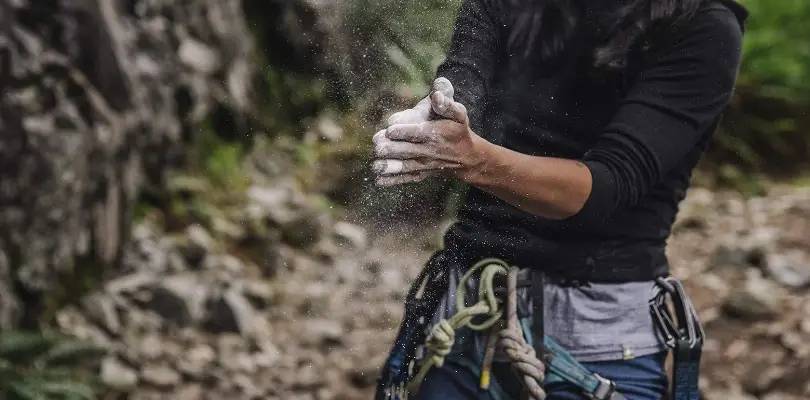
How to make liquid chalk? Most beginner climbers start with loose chalk, but most of those who don’t give up switch to liquid chalk later. If you are a regular in climbing gyms or contemplating ways to make your next climbing trip preparations less costly, it is worth a shot to make your own liquid chalk.

- What is liquid chalk?
- Why liquid climbing chalk is so popular?
- It’s a sanitizer, too
- Homemade liquid chalk: cheap, easy to make
- Ingredients and tools to make liquid chalk
- Chalk to use
- Alcohol
- How to make liquid chalk?
- Step one – sifting
- Step two – mixing
- Step three – scenting
- Step four – bottling
- Downsides and cautions
- FAQ
- Can I make my own liquid chalk?
- What is liquid chalk made of?
- Conclusion
What is liquid chalk?
Liquid chalk is a mixture of regular chalk powder, which is magnesium carbonate, and a strong alcohol base, with isopropyl alcohol, ethanol, or bio alcohol being among the options.
Its paste-like consistency and extra ingredients slightly vary from brand to brand, costing anywhere between $6 and $20.
Applied in liquid form, climbing chalk spreads more evenly than loose powder and makes no waste. Alcohol evaporates, leaving a nice dry surface that is functional for a long time and is ready to take more of the powdered chalk if you apply it later.
Why liquid climbing chalk is so popular?
Since the beginning of covid-19, many climbing gyms introduced a no-powder policy for hygiene reasons. With using a chalk stand accessible to all now banned, the decrease in using dry chalk is logical.

But even without this, the liquid chalk still wins where the loose chalk fails. And some reasons are the following:
- no dust to breathe in – huge advantage for crowded gyms;
- almost no mess on you and around you;
- smaller trace left in nature, where chalk can mess up the pH levels of rocks;
- small and controllable amounts used.
But the most important thing about climbing chalk is how effectively it improves your grip, and this is exactly what the wet formula does best – due to its alcohol base.
Liquid chalk creates a smooth thin layer on the uneven surface of your hands instead of clogging in the creases and falling off however it wants.
Also, alcohol reduces the natural sweatiness of your palms – better grip, and a long time without reapplying.
It’s a sanitizer, too
The absence of potentially infected dust clouds in public places is not the only covid-related advantage of the liquid chalk. We all use 70% rubbing alcohol to sanitize our hands, and something made of it will naturally have the same effect. Never too much hand sanitizing, as we now know – great, isn’t it?
Homemade liquid chalk: cheap, easy to make
One of the downsides of store-bought liquid chalk is its price. The ingredients are so much cheaper separately, as it all boils down to plain dry chalk and rubbing alcohol. Sure, a brand product with a refined formula is bound to cost more. But liquid chalk is also hilariously easy to make at home.

Ingredients and tools to make liquid chalk
To make liquid chalk, you won’t need to be a science expert. All you need to know is what kind of alcohol you are using and how to mix stuff. You won’t need a particularly large arsenal of tools either. Here’s all you are going to need:
- regular chalk;
- alcohol base (ethanol, isopropyl alcohol, etc.);
- a measuring cup;
- a large bowl or some other vessel for mixing;
- a fine mesh strainer;
- a silicon spatula, whisk, or wooden spoon;
- an airtight container (or several);
- a grinder, mortar and pestle, and/or rolling pin (if you grind the chalk yourself);
Chalk to use
It doesn’t matter what kind of loose chalk you use if it’s pure enough magnesium carbonate. You can empty an old chalk bag, opt for your favorite powdered chalk, grind a block, mix the leftovers, or use school chalk if you happen to have it. Not that it’s all the same completely, but any dry chalk will do.

Alcohol
The type of alcohol is what makes a difference for DIY liquid chalk. It needs to hold the mixture together, make it easy to use, and it must evaporate fast. Not all alcohol is up to this standard.
The best would be pure ethanol, but that defeats the purpose of making your climbing chalk cheap.
Rubbing alcohol makes up for that, but its alcohol content must be over 70%. Otherwise, your hands will dry up forever (or so) once you smear the chalk on them.
See if a bottle labeled isopropyl alcohol claims to be 70% or higher before buying.
Another legit solution for liquid chalk (and least smelling) is to use bio alcohol. It’s also good if you want to keep it eco-friendly as well as to save money.
How to make liquid chalk?
Regardless of the dry chalk you use, make it into as fine a powder as you manage to by any means available.

A fine powder is a key to making liquid chalk homogenous and smooth. Once you get your fine powder ready, it’s time to mix.
Homemade liquid chalk requires 2 parts of chalk and 1 part of alcohol. As long as the proportion is roughly 2:1, you’ll get chalk paste similar to toothpaste in consistency.

More alcohol will lead to thinner chalk, but better if you keep it close to this ratio.
Step one – sifting
Sift your chalk powder into a bowl through a strainer. This process is likely to be dusty and messy, so you might want to use some sort of coverage, like a box or a paper bag. Still, be prepared for a cleanup when you are done.
Step two – mixing
Once dry chalk is there, slowly put alcohol into it until you achieve the intended consistency. Make pauses in pouring but keep stirring constantly – to such an extent that no lumps could remain.

Step three – scenting
Your liquid chalk is pretty much ready, but if you thought about putting essential oils in it or otherwise altering the process to make it more to your taste, now it’s time.
Step four – bottling
Time to transfer your liquid chalk into an airtight container for storage. It can be a squeeze bottle, a zipper plastic bag, or a travel shampoo bottle – it’s ok as long as it’s a fully airtight container, or your chalk will soon expire.

A container for liquid chalk should be small, as evaporation will ruin big amounts anyway.
You can put a plastic bag over a container to ensure your liquid chalk stays fresh longer. A small package is also much easier to put in your climbing bag.
Downsides and cautions
Homemade liquid chalk can improve your rock climbing experience, but it’s not by any means flawless.
Firstly, allergies. Substances like rubbing alcohol, let alone essences and such, can cause a range of reactions from irritation to swelling and breathing difficulties.

In this case, you should stick with standard climbing chalk with no additions.
Then, simply having sensitive skin or scratches can cause significant discomfort, as alcohol dries your skin further and stings in any wound.
If using hand cream afterward does not solve this, you need to know that alcohol-free liquid chalk is rare but possible to come by.
FAQ
Can I make my own liquid chalk?
Yes, liquid chalk is easy to make at home. The article above provides you with a guide on how to make liquid chalk that is just as good for rock climbing as any options on the market.
What is liquid chalk made of?
Liquid chalk is made of magnesium carbonate (dry chalk) and a high percentage alcohol base in the 2:1 proportion.

Conclusion
DIY liquid chalk is a great, cheap, and easy-to-make alternative to buying a ready-made product. Its simplicity does not take away from how effective it is in the gym or on a climbing route. Recommended for a try if you are still doubting. Read about the best ways of climbing warm-up in the new article

